What is Heat Transfer Vinyl: 5 Fascinating Facts about HTV
- Wendy Hancock
- Nov 30, 2022
- 5 min read
Updated: Dec 9, 2022

In the crafting world, there is a multitude of materials to choose from when you're looking to create a new project. Have you ever wondered how those trendy t-shirts and hats are made?
Chances are, they were made using heat-transfer vinyl! It is one of the most popular materials that can be used for various purposes, including home decor, apparel design, and even signs. But what exactly is this type of vinyl?
What is HTV?
Heat transfer vinyl, or HTV for short, is a type of self-adhesive vinyl that can be used with a heat press or an iron to create designs and patterns on fabric. Unlike traditional vinyl, it is applied with a heat press instead of stickers, allowing for a more durable and long-lasting design.
It's a popular choice for both personal and professional projects, and it's not hard to see why. It is relatively inexpensive, easy to use, and durable. It's also very versatile; you can find it in various colors, sizes, and thicknesses to suit your needs.
And to help you become better acquainted with this handy material, here are five fascinating facts about HTV.
#1. It is made from either PVC or PU
PVC stands for polyvinyl chloride, which is a type of plastic. HTV is made by combining PVC with other chemicals to give it the properties that make it ideal for clothing use. It has a shiny finish and can be used on various fabrics, including cotton, Polyester, and Lycra/Spandex.
On the other hand, PU, or polyurethane, is a newer type of HTV with a matte finish. It can be used on the same fabrics as PVC but works well on natural fibers like wool and linen.
Both materials are durable and long-lasting, but PU is more flexible and has a softer feel. So, when choosing between the two, it's important to consider the type of fabric you'll be using and the desired look and feel of the finished product.
#2. It has a pressure-sensitive adhesive backing
If you've ever worked with heat transfer vinyl, you know that one of its key features is its ability to adhere to the fabric. But have you ever wondered how does it stick to cloth? The answer is simple: adhesive!
The adhesive backing on HTV is what allows it to stick to the fabric using a heat press or an iron. When you apply heat to the vinyl, the adhesive activates and bonds with the fabric fibers. This ensures that your designs will stay put even after many washes, which means less time spent fussing over pesky mistakes and more freedom for crafting new things like never before!
#3. You can use it on more than just clothes
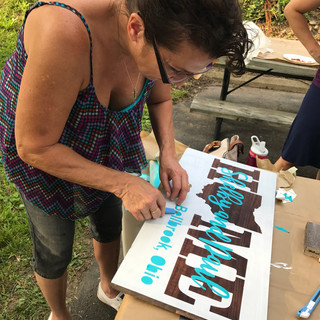
If you're looking for a way to add some personal flair to your belongings, HTV may be the perfect solution. Although it's most commonly used on clothing, it can also be used on other materials like canvas bags, felt blankets, or even wood signs. The sky's the limit!
With the variety of ways you can use it, it's no wonder this material has become such a popular choice for designers. There are virtually no limitations when crafting your items using this great product!
#4. HTV comes in sheets or rolls
Heat transfer vinyl comes in two different formats: sheets and rolls HTV. Both have their advantages, so it's really a matter of preference.
If you're working on a small project, like a monogram for your t-shirt, then sheets are the way to go. They're easy to maneuver and don't require any cutting tools - you can simply cut them out with scissors. This is also a good option if you're new to working with heat transfer vinyl. However, one downside of sheets is that they can be more expensive than rolls.
Rolls, on the other hand, are better suited for larger projects. They're also a good choice if you need a lot of vinyl - for example if you're making stickers or decals. One downside of rolls is that they can be more challenging to work with, especially if you're new to this type of craft. But once you get the hang of it, they'll be a breeze! And because they come in such large quantities, they're often more affordable than sheets.
Whichever way you go, HTV is a great way to add some personality to your clothes or accessories. So have fun and experiment! There's no wrong way to do it.
#5. You don't need fancy equipment

While HTV can be applied with a household iron, you'll want to use a heat press machine for the best results. The heat from the press will help activate the adhesive backing on the vinyl, making it more effective at bonding with fabric fibers. Once heated, smooth out any wrinkles and press the vinyl on your garment or project. You can use a craft roller or something similar to get a nice, even finish.
And that's it! With a little bit of heat and pressure, you can easily turn any fabric item into a one-of-a-kind masterpiece. With a little practice, you'll be a pro in no time!
BONUS: Tips, Tricks, and Techniques
If you're like me, then you love all things crafty! :) I especially love working with HTV as it's so versatile, and there are endless possibilities for what you can create. But while it is a great way to personalize your projects, it can be a little tricky to use at first. So let me share with you my favorite tips, tricks, and techniques for working with it. Read on for some helpful advice!
1. Choose the right type.
The right type of heat transfer vinyl can make all the difference. Choose between PU and PVC, both with their advantages, depending on what you plan to do with them!
PU is thinner and has a softer feel, making it ideal for printing onto clothing. PVC, on the other hand, is thicker and more dependable; its texture won't leave behind any wrinkles or marks after being applied directly onto something else, like a coffee mug.
So, whether you're looking to add a personal touch to your wardrobe or give a loved one a unique gift, make sure you choose the right type of heat transfer vinyl for the job!
2. Preheat your fabric.
Preheating is the key to great results, and you must have the right equipment.
Use an iron set on its hottest setting (this will vary depending upon what kind or material you're working with) for at least 15-20 seconds before applying any heat transfer vinyl. This will help the HTV adhere to the fabric better.
3. Apply pressure.
Once you've placed the HTV on fabric, you'll need to apply pressure to seal it in place. You can do this with an iron or a heat press machine.
If you're using an iron, use the hottest setting appropriate for your fabric and apply firm pressure for 30-60 seconds. If you're using a heat press machine, set it to 350 degrees Fahrenheit and apply firm pressure for 15-20 seconds.
4. Let it cool before peeling off the backing paper.
All HTV comes with a different application, some are HOT peel, and some are COLD peel. It makes a BIG difference if you try to peel hot on a cold peel; the HTV might just peel up with the backing and not adhere if you try to peel cold once the HTV is set, you may not be able to remove the backing. Always read the application instruction for the best results, time and pressure and peel temperature are all key factors to success!
Wrapping It Up
So there you have it! Some tips, tricks, and techniques for working with heat transfer vinyl. Hopefully, this will help to get you started on your projects. Be sure to experiment and find what works best for you – everyone’s technique is a little different.
Are you excited about your first heat transfer vinyl project? Or do you want to give someone a gift without pressing the heat? Well, Craft Vinyl Outlet is here to help! We have everything for all your HTV needs. From HTV sheet rolls to crafting equipment and presses-we got you! And if you're unsure where to start, we can help you find the perfect project for your unique style.
Contact us and explore our wide range of products and services. Happy crafting!


Comments